
Enable the resource for Rental
You can mark a simulator as available for rental slots either during its initial creation or at any time by editing its existing profile.
Navigate to your Aircraft list in the administrative menu.
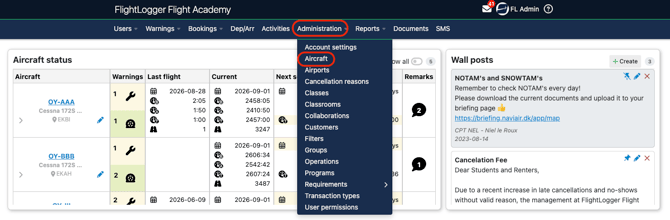
Select the Edit icon (or do this when creating a new resource).
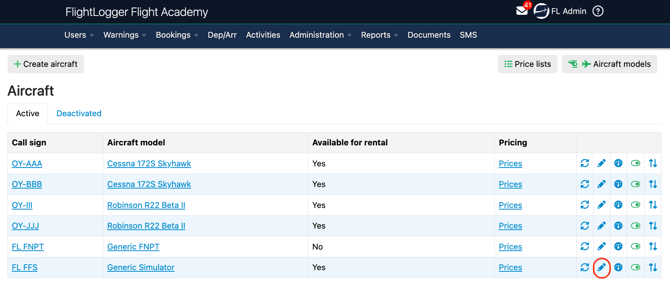
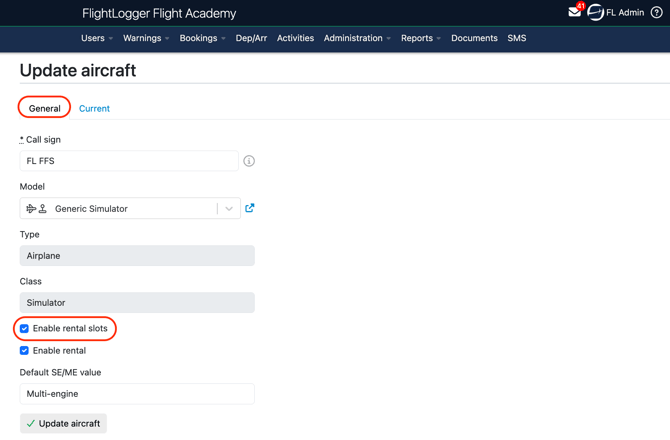
In the General menu locate the Enable Rental checkbox. Check the box to Enable rental slots. Save your changes.
*Note: Ensure that the Enable Rental checkbox is checked on the simulator's configuration page. If this setting is disabled, defined slots will only be available for internal organizational use, and external rental clients will be unable to see or request them.
Define Available Slots in the Schedule Calendar
Once slot creation is activated, you must define the available time blocks on the simulator schedule.
Navigate to the specific simulator's profile and open its Booking view. Choose Availabilities.
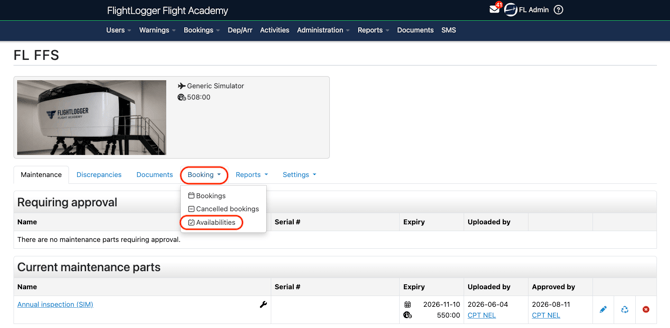
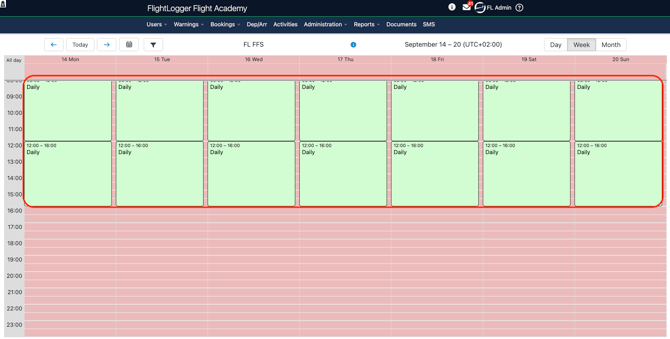
Select the dates and specify the time blocks when the simulator will be available for dry-leasing, for example, creating recurring 4-hour slots throughout the operating day.
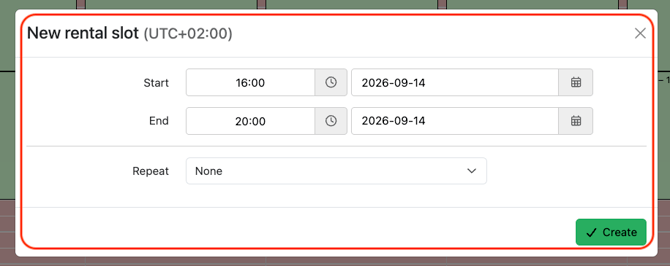
Open the booking widget by clicking directly on your desired start time on the calendar, or simply click and drag your cursor from your start time to your end time.
You can also manually adjust the dates and times inside the booking modal at any point. To schedule recurring sessions, use the Repetition setting to automatically repeat your booking on a daily, weekly, monthly, or yearly basis, saving you from having to create each booking individually. Save the schedule.
These open slots will now act as available inventory for qualified renters.
Assign Rental Permissions to a User Account
Once a simulator is marked as available for rental, you must grant renters permission to view and request bookings for that resource.
*Note: If this is an existing user you want to give rental user capabilities to, go to the user's profile page, click Edit info under settings, and scroll to the bottom.
If you are creating a new renter from scratch, it will automatically open on the Edit info page, ust scroll to the bottom and follow the same steps.
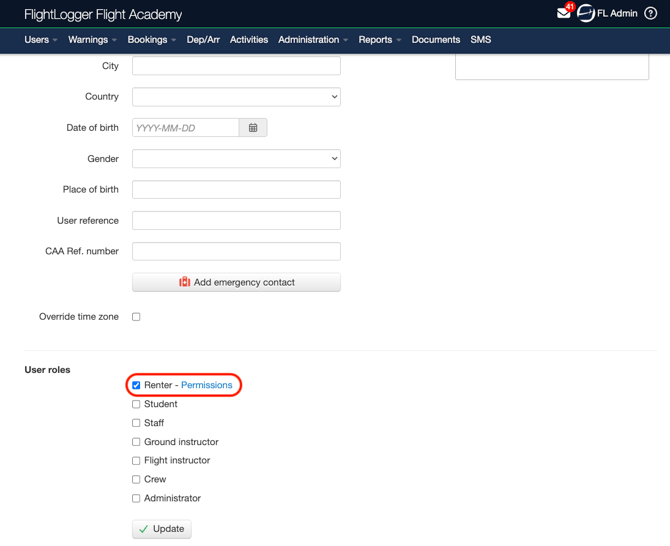
Go to the Edit Info menu of the user. Scroll down to the account role settings and check the Renter option. Once Renter is selected, a blue Permissions link will appear.
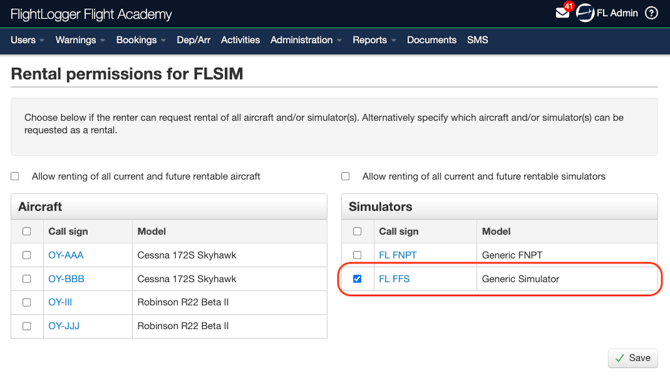
Clicking on the Permissions option you will see a list of all aircraft and simulators currently enabled for rental across your account. Check the specific aircraft or simulators that this user is authorized to rent. Click Save.
What the Renter Sees
The renter will log into FlightLogger and open their booking request calendar.
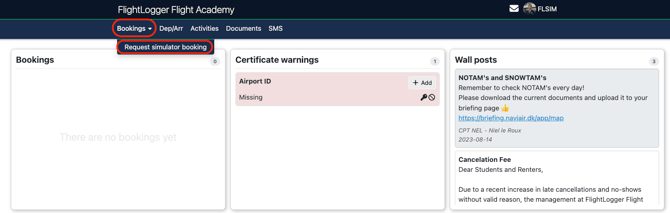
Only the simulators you have specifically checked in their Permissions box will be visible. All available slot times will also be visible.
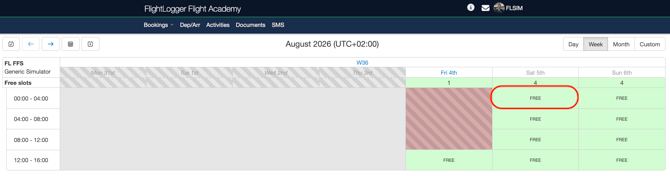
A rental request for the resource is now made by clicking on the desired slot.
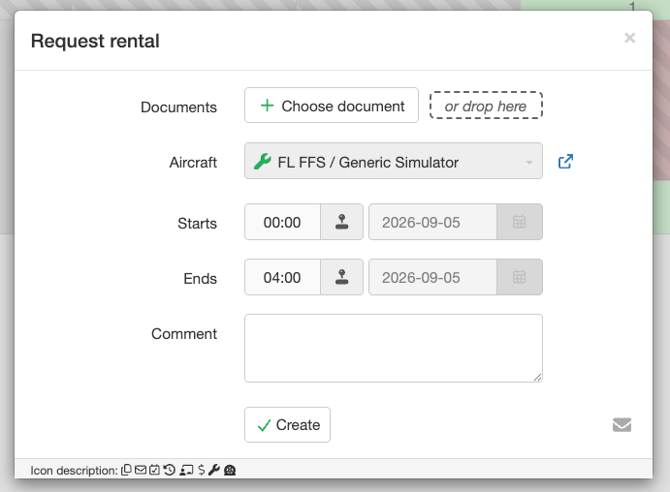
Once submitted, the renter's request is routed to your organization's Rental Administrator for review (with email notification as well).
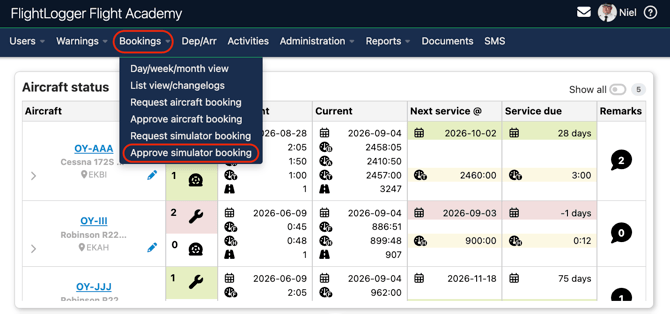
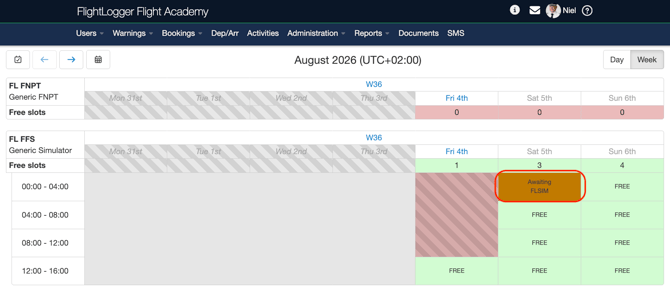
The administrator can then either approve or decline the request:
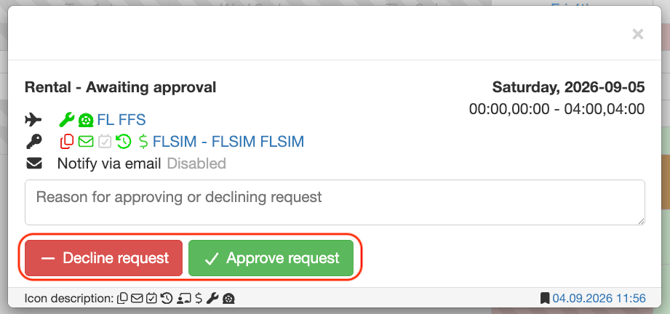
- Approved: The booking is confirmed on the main schedule. Upon completion of the simulator session, the renter can proceed with the standard registration workflow.
- Declined: The request is rejected, and the renter is notified.
For complete instructions on how a renter completes rental flight entries, please see our guide on Registering an Rental Flight.
Need help?
If you need assistance, feel free to contact our support team via the Get Support tab inside FlightLogger.