
Permission
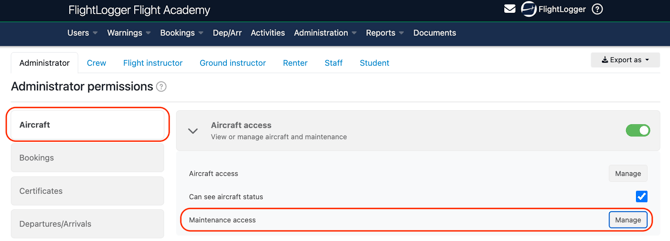
All users can be allowed to create maintenance requirements, as long as they are given the correct permission.
Access can be granted either to an entire user group or to an individual user.
To learn more about permissions, have a look at this article.
To grant access at group level, go to the relevant user group settings, locate the permissions section under Aircraft, and enable maintenance access.
Assigning Maintenance Requirements
Maintenance requirements can be assigned in two primary ways.
They can be attached to a specific Aircraft Class or directly to an Individual Resource (Aircraft/Helicopter/Simulator).
Choosing the right method depends on how broadly the requirement should apply and how you want it managed within your operation.
Assignment on Aircraft Class
To start with assignments, go to Administration, open the drop down menu, select Requirements, and choose Assign.
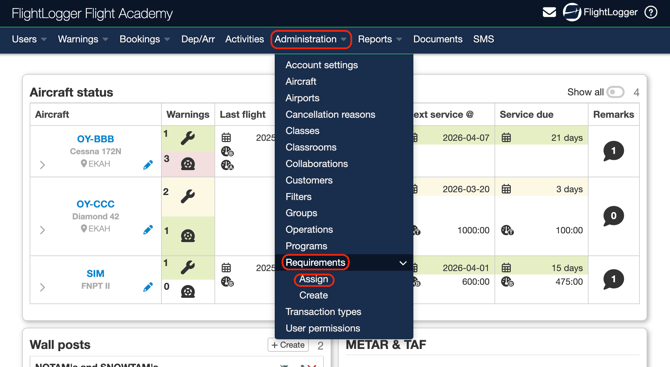
This will open the assignment page.
At the top of the page, you will see the available Classes.
To assign a maintenance requirement, the first step is to choose the relevant Class. You can select between Single engine, Multi engine and Simulator.
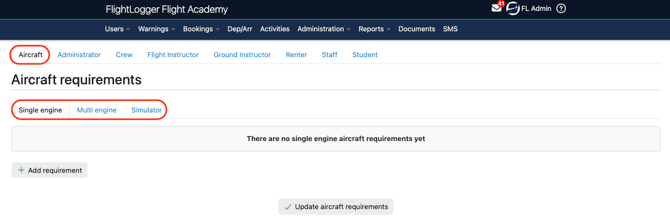
From the list, click Add requirement.
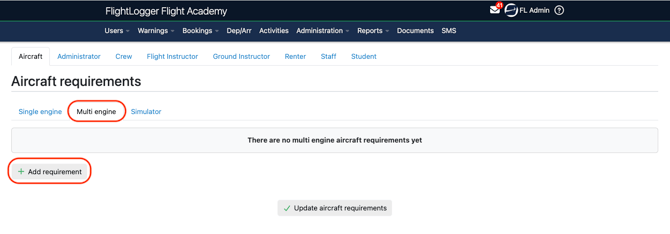
Then select the relevant requirement from your previously created master list
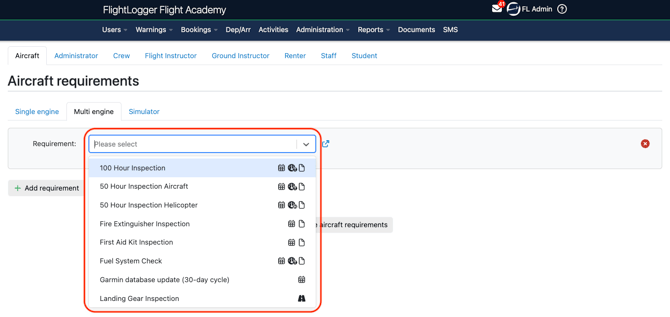
Choose the requirement from the list, and then select Update requirements.
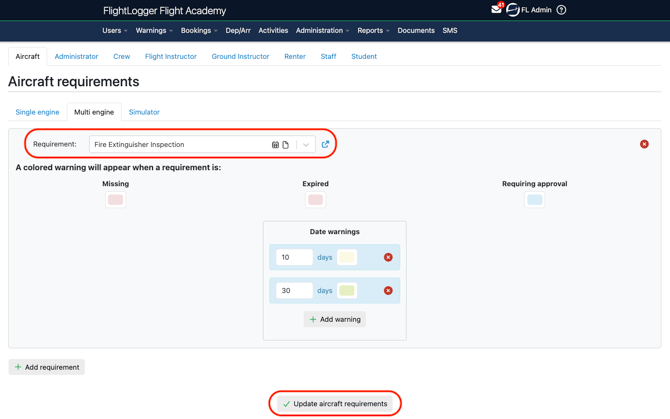
Once assigned to a Class, the requirement will automatically apply to all aircraft within that class.
Assignment on the Individual Resource
The second option is to assign a requirement directly to an individual Resource.
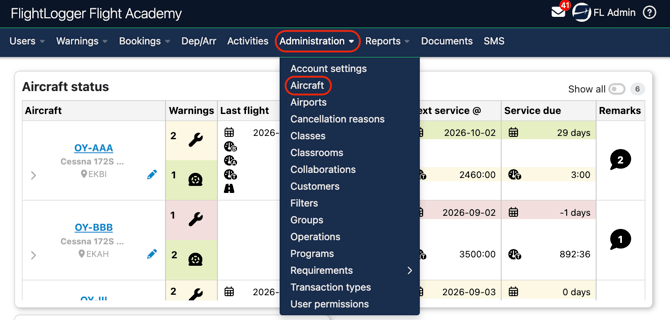
Go to Administration - Aircraft.
Select the specific Aircraft.
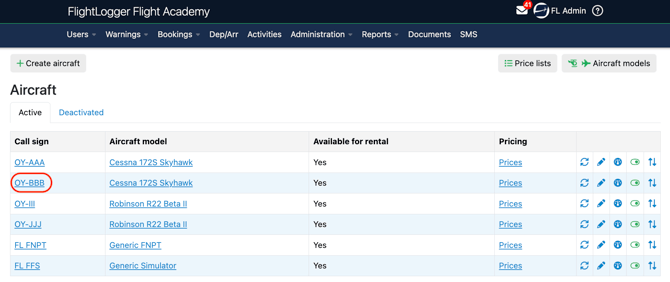
Under Settings, choose Requirements.
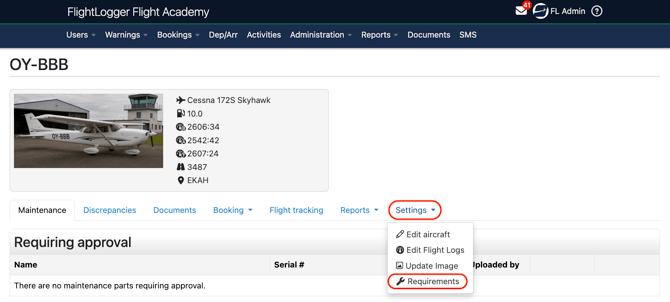
Add the specific requirement to that resource. The requirement will apply only to this individual aircraft. Other aircraft in the same group will not be affected.
Individual assignments are typically used when a requirement applies only to one aircraft. For example, if most of your fleet uses classic analog instruments but one specific aircraft features a glass cockpit, you can attach database update requirements exclusively to that single tail number without affecting the rest of your fleet.
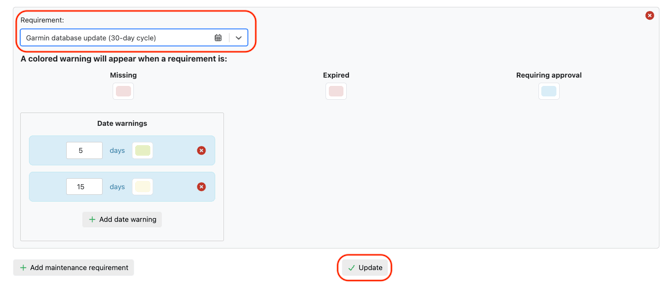
Editing options
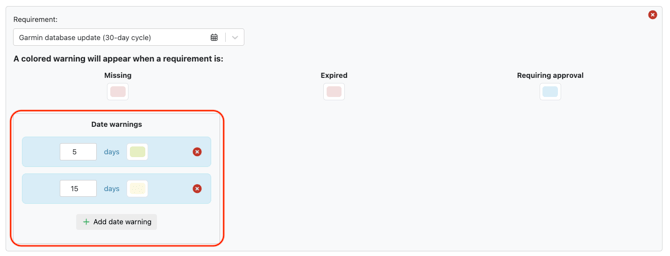
As explained in the sections about creating requirements, you can configure warning times, warning colors, and notifications.
These same editing options are available when assigning requirements.
The system includes default warning colors for missing requirements, expired requirements, and requirements awaiting approval. These colors provide a clear visual indication of the current status.
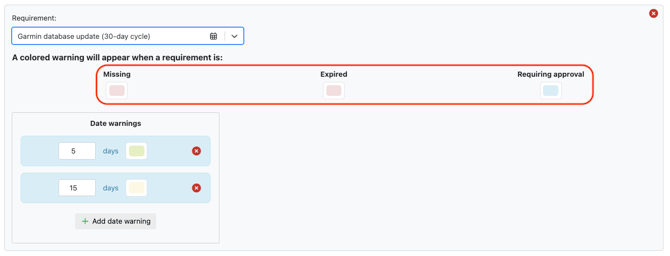
These colors can be changed by clicking on the colour box, which opens the color configuration window. Here, you can define your own custom colors as needed.
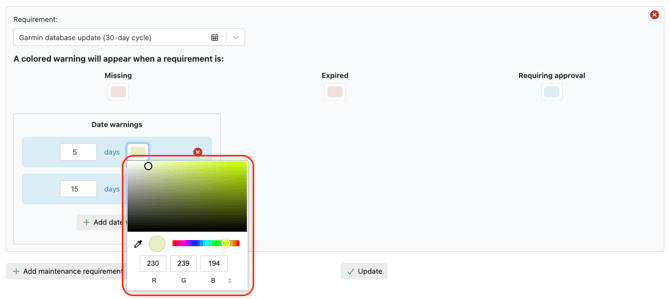
The selected colors will be reflected on the aircraft profile page and on the Aircraft Status page, giving users immediate visual feedback on the maintenance requirements of the resource ..
Under the Default warnings, all warning time intervals can also be edited to match your operational needs. These will define how long before expiry a notification should be triggered.
You can also change the warning colors, as described earlier.
If you want to remove a default warning, you can delete it using the delete option.
You may also add additional warnings, for example a third or fourth time based reminder, depending on how early you want to be notified.
When you have finished configuring the requirement, remember to select Update to save it.
Need help?
If you need assistance, feel free to contact our support team via the Get Support tab inside FlightLogger.