
Interactive demo of creating a new student from scratch
Watch the walkthrough below for a step-by-step look at creating a student in FlightLogger, from filling in their profile to assigning a training program and class:
Creating a student
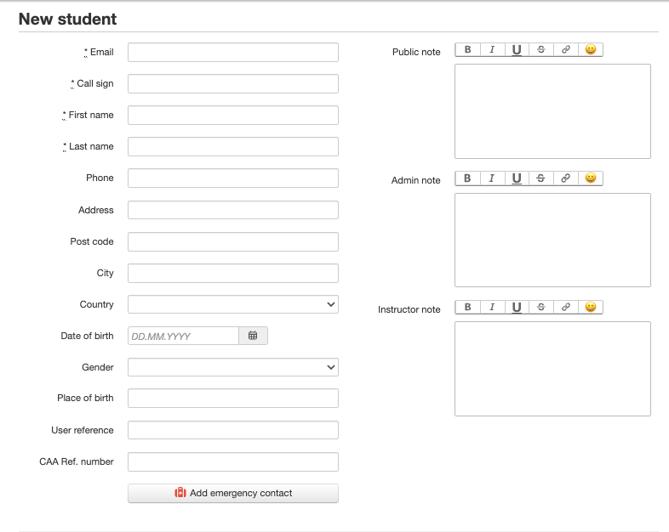
To add a new student, go to Users > Students, then click Create and select Student.
Fill in the required fields: Email, Call sign, First name, and Last name.
You can also add:
- Public note, Admin note, or Instructor note — use these to record any relevant information about the student.
- Emergency contact — click Add emergency contact to enter a contact's name, email, phone, and address.
Assigning a training program
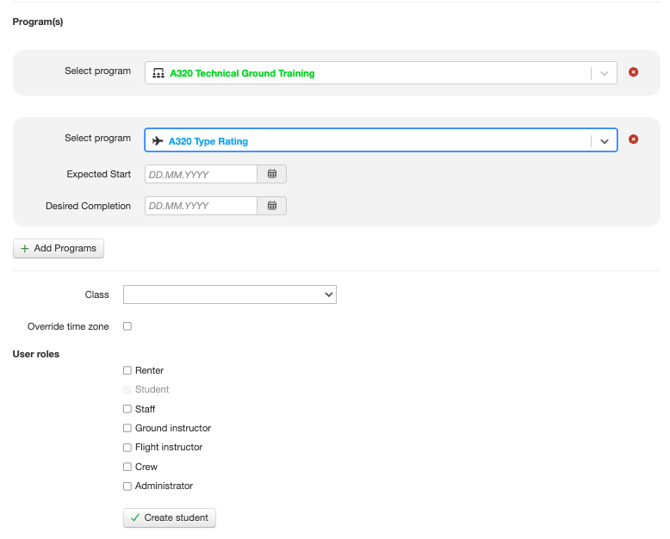
Select a program from the dropdown to enroll the student. This sets the student's account to Active. Click Add Programs if the student needs more than one.
Note: If your school uses the Student Progression Module, you can also set an Expected Start and Desired Completion date for each program.
Assigning a class
If the student belongs to an existing class, select it from the Class dropdown.
Setting user roles
By default, a new user created this way has the Student role. If the student also needs to be a renter, staff member, instructor, or administrator, select the relevant roles before saving.
For more on permissions, see Managing user roles.
When you're done, click Create Student to save.
Contract support
If you run into any issues creating a student, or need help with a specific training program setup, contact our support team using the Get Support button inside FlightLogger.