This article explains how invoices are created and sent to QuickBooks using the QuickBooks Integration Module (QIM).
Before you can start using QIM, the module must be activated on your FlightLogger account and connected to your QuickBooks account.
Instructions on setting this up can be found on this help center article.
Watch this click-through video on our QuickBooks Integration Module
QIM makes it super convenient to create QuickBooks invoices based on activities logged in FlightLogger - from within your FlightLogger account.
Once enabled, QuickBooks invoicing is managed from:
Reports -> QuickBooks invoices
How the invoice workflow works
The normal QuickBooks invoicing workflow in FlightLogger is:
- An activity is logged in FlightLogger.
- The activity appears under Create Draft.
- An invoice draft is created and reviewed in FlightLogger.
- The draft is sent to QuickBooks.
- The final invoice is managed in QuickBooks.
Opening QuickBooks invoices in FlightLogger
Go to:
Reports -> QuickBooks invoices
The page is divided into invoice sections such as:
- Create Draft
- Show Drafts
- Invoiced
Depending on your account setup and enabled features, you may also see additional invoice or payment-related statuses.
Create draft
Every time an activity is logged on your account, an instance automatically appears as a new line in the Create draft section.
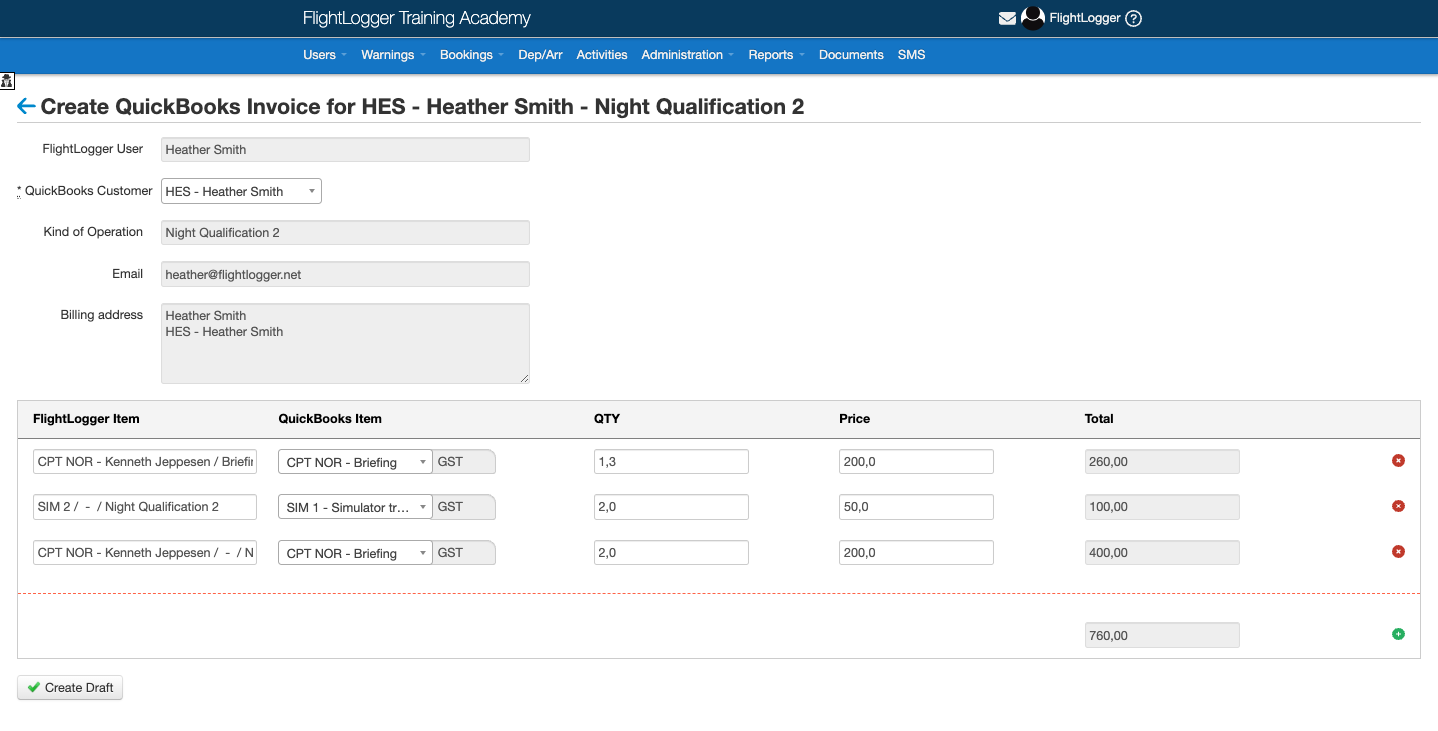
To create an invoice draft from a registration, click the registration time stamp.

This opens the editor where the details of the registration is mapped with items from your QuickBooks account.
Before creating the draft, review the following:
- QuickBooks customer
- Billing email
- Billing address
- QuickBooks billing item
- Quantity
- Unit price
- Tax and total, if shown
The billing email and billing address are taken from the selected QuickBooks customer and cannot be edited directly in FlightLogger.
FlightLogger will suggest QuickBooks billing items based on the activity details. If the suggested item is not correct, click the QuickBooks item field and select the correct item.
Quantities and unit prices can be edited before the draft is created.
When the draft looks correct, click Create Draft.
The activity is then removed from Create Draft and the invoice draft can be found under Show Drafts.
You may also have the option to send the draft to QuickBooks immediately after creating it.
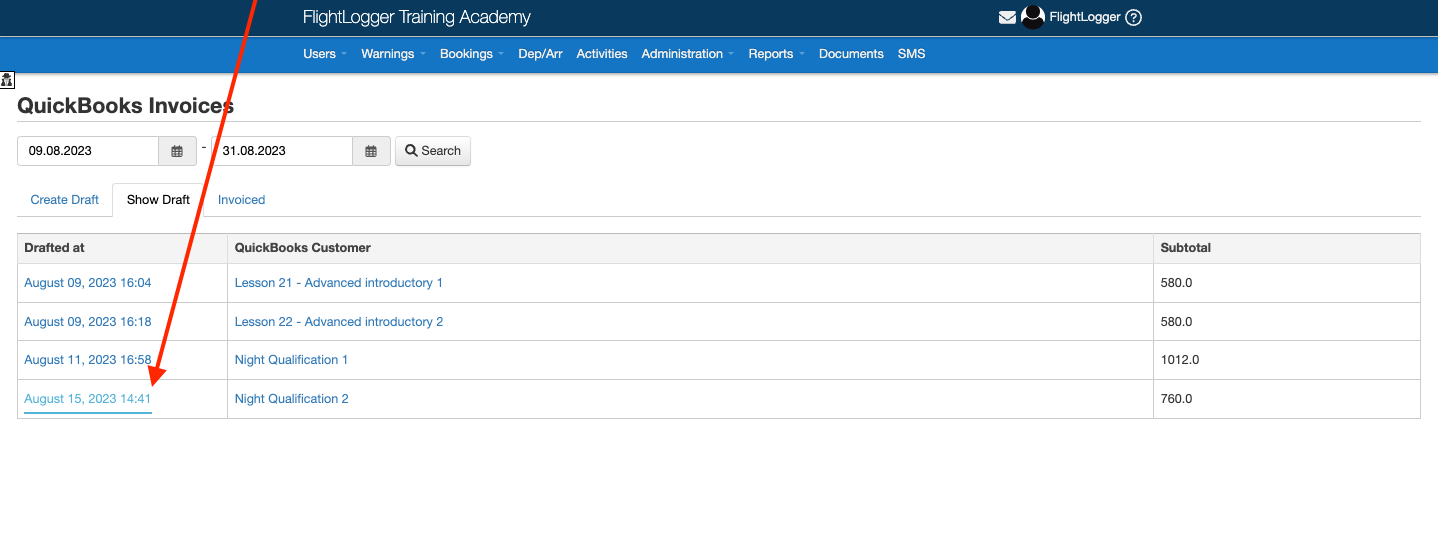
Show Draft
The Show Drafts section contains invoice drafts that have been created in FlightLogger but have not yet been sent to QuickBooks.
This section is useful as a final review step before sending invoices to QuickBooks. It can also support workflows where one person creates invoice drafts and another person reviews or sends them.
To open a draft, click the draft date.
The draft opens in a locked overview. From here, you can either edit the draft or send it to QuickBooks when it is ready.
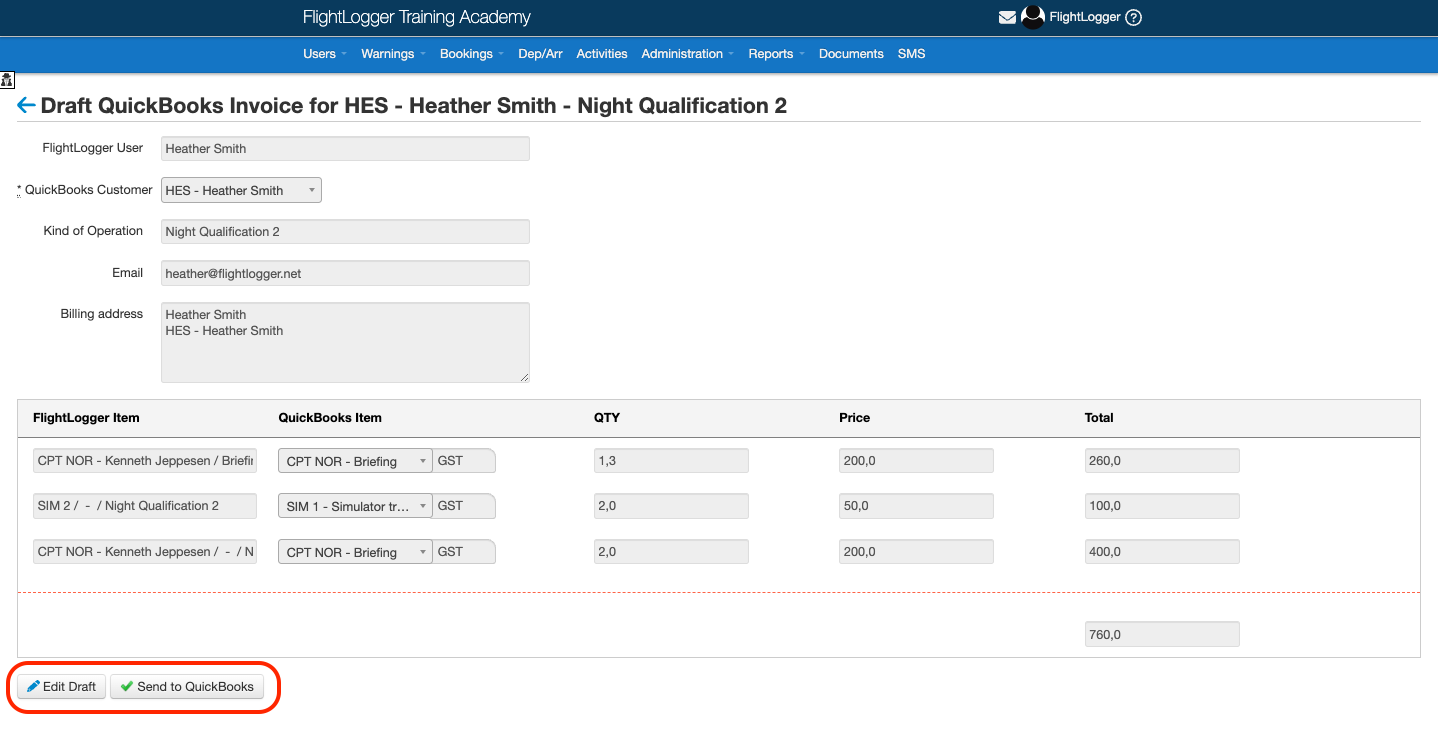
Sending a draft to QuickBooks
When the draft has been reviewed and is ready, click Send to QuickBooks.
FlightLogger will then create the invoice in your QuickBooks account.
Once the invoice has been sent, it is moved from Show Drafts to Invoiced in FlightLogger.
If needed, you can still edit the invoice in QuickBooks after it has been sent, for example to add extra billing items, discounts, or other accounting-specific adjustments.
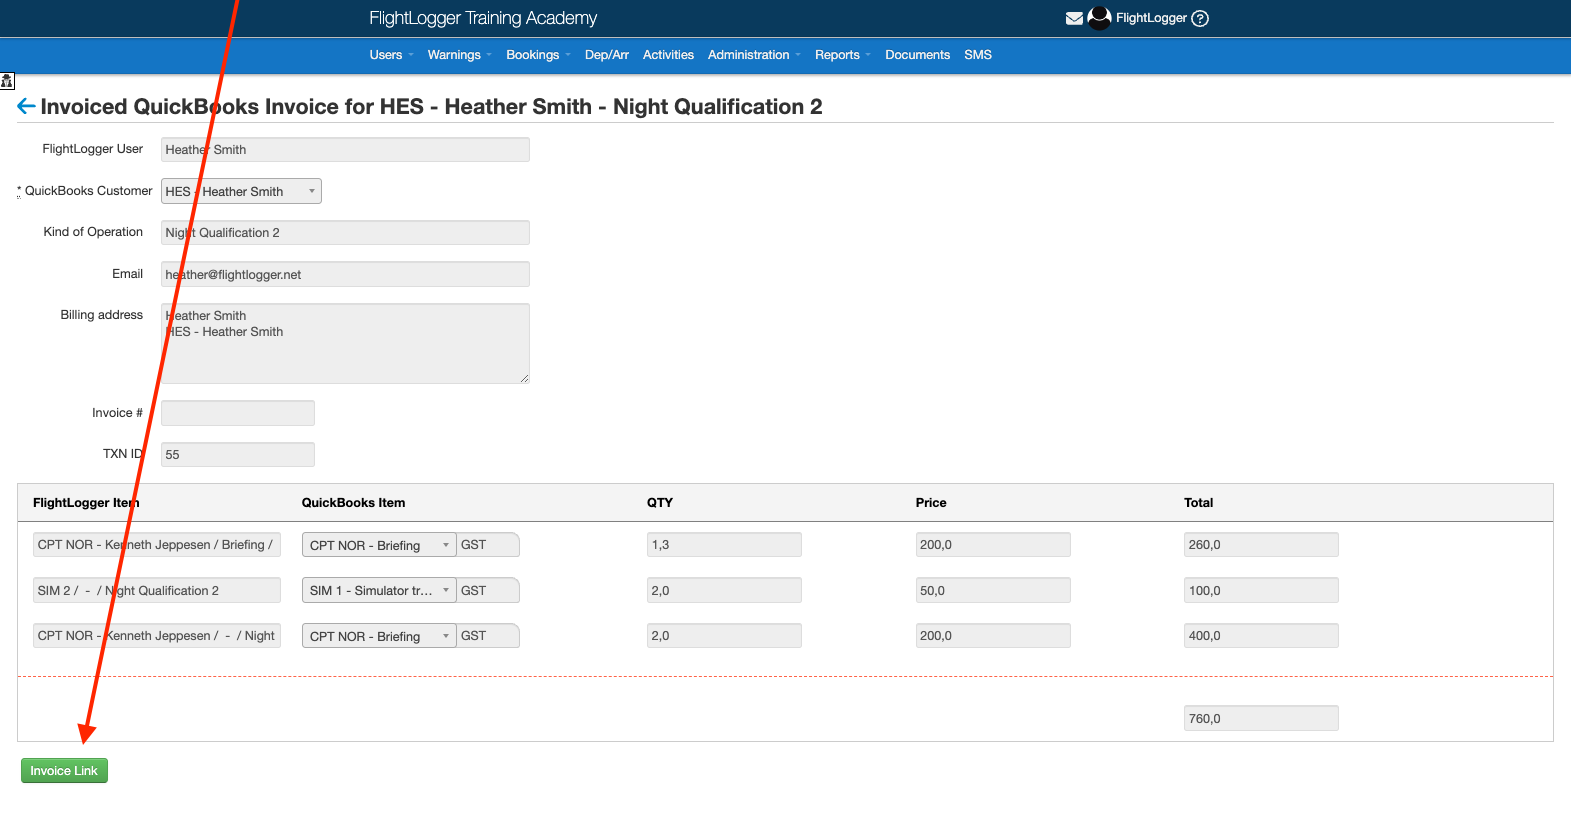
Invoiced
The Invoiced section lists all the invoice drafts that have been sent to your QuickBooks account.
When opening an invoice by clicking the Invoiced at date, you can now open the invoice in QuickBooks by clicking the Invoice link button.
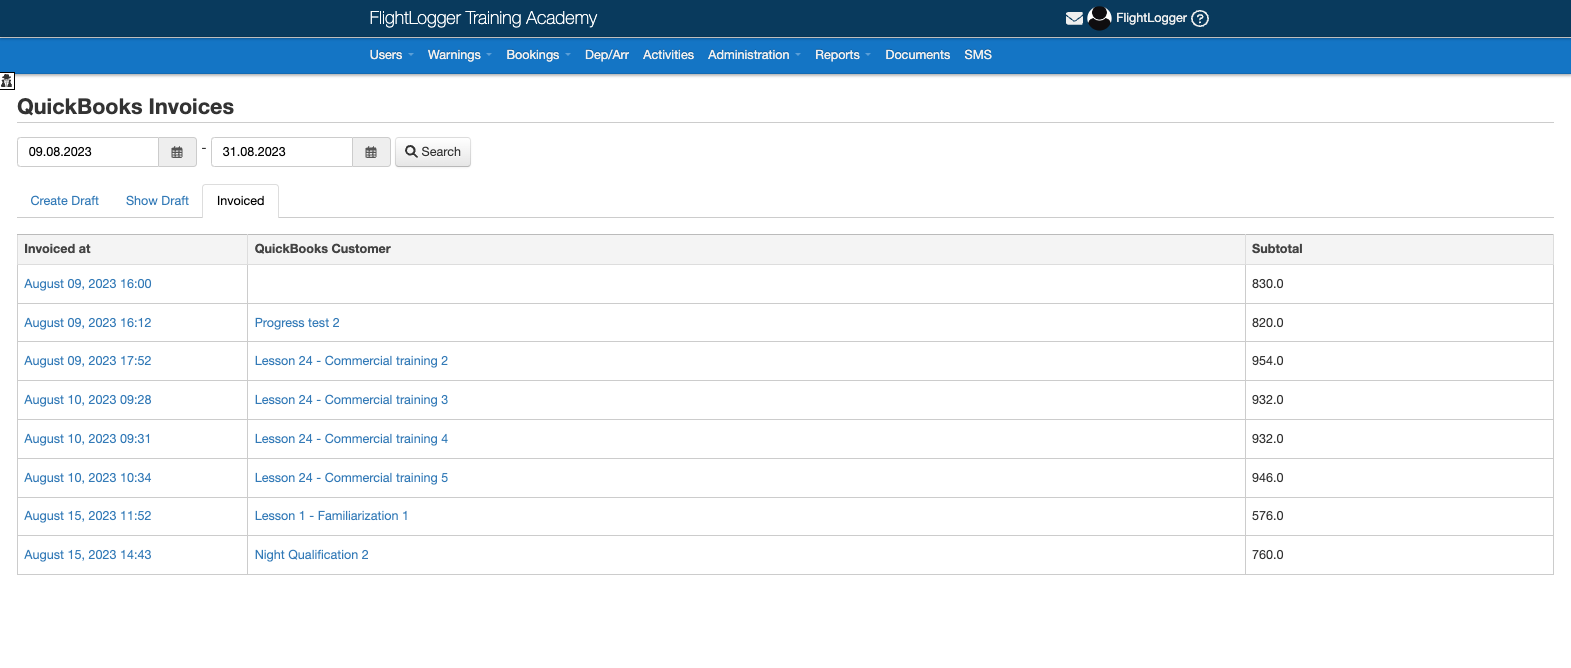
Click to open invoice in QuickBooks:
Important QuickBooks invoice number setting
We recommend leaving Custom transaction numbers turned off in QuickBooks.
When Custom transaction numbers are turned off, QuickBooks can automatically generate invoice numbers.
If this setting is turned on, FlightLogger may not be able to handle generated invoice numbers automatically in the same way, and your organization may need to manage invoice numbers manually between FlightLogger and QuickBooks.
Common things to check before sending an invoice
Before sending an invoice draft to QuickBooks, check that:
- The correct QuickBooks customer is selected
- The billing email and billing address are correct in QuickBooks
- All invoice lines are matched to the correct QuickBooks billing items
- Quantities and unit prices are correct
- Tax settings are correct in QuickBooks
- The invoice is ready to be finalized in QuickBooks
Related articles
- Getting started with the QuickBooks Integration Module
- Getting the best mapping of FlightLogger activities with QuickBooks billing items
Please reach out to our support team if you have any questions. Simply click here or send an email to support@flightlogger.net, and we will get back to you.